Part 4 of Customizing Your Smart Phone series (part 1, part 2, part 3), final installment. This time we are going over the most complicated of the three steps I have mentioned before – installing a customized OS and software package into phone’s permanent memory.
Since phones have two different kinds of non-volatile memory, understanding what goes where is a bit tricky. There’s a part that will hold on to the data even if you do a hard reset. There’s a part that will keep your data if you pull the battery out, but will not survive hard reset or memory clearing operation. And there’s a part that will keep your data only as long as the battery is alive or a power provided. So installing a new OS/software package involves rewriting data in both first and second parts of the memory.
Such packages are called ROMs, and these come in two flavors. Standard ROMs come from either a hardware manufacturer (HTC in our case) or cell phone provider (AT&T). Alternatively (and that’s where the fun begins), they are “cooked” ROMs and these come from “chefs” – those geeky types who just love to tweak their phones beyond comprehension. Cooked ROMs are, generally, created following chefs’ philosophies – that means either stuffing as much as possible into a crumpled phone’s memory or by leaving out as much as humanly possible to free up scarce phone’s resources.
That’s where the tricky part starts. Some cooked ROMs will only work with certain types/versions of radios. That means that you, essentially, have to think the whole process through even before you started (but shouldn’t you always?). Luckily, latest versions of radios generally tend to work with every modern and supported ROM out there, but doing a homework wouldn’t hurt. Once you done browsing through all the feature listings and screen shots, jot down a list of ROMs you tend to like and get going.
Install a HardSPL and the latest available radio. Then download and install each of ROMS on your list for initial testing. Most likely critical bugs will pop out fast that your list would shorten pretty quickly (I had to go through that twice because not a single ROM satisfied my needs, so I’ve got what seems to be the closest match and then went on with customizing it). Some ROMs come so overloaded that it’s almost impossible to get anything done, others quite snappy but lack important features. Once you’ve made your choice – start customizing and testing.
When testing, aside from looking at how glorious your brand new interface looks like, you should also pay attention to:
- phone reception quality, especially in places where you know services have been exceptionally good or exceptionally bad;
- battery drain, especially during normal patterns of activity (i.e. if your battery survives longer then usual even though you started to play with your phone more – you’ve made the right choice);
- GPS reception and time to lock on satellites;
- overall system responsiveness (does opening browser or bringing up the phone takes longer or shorter, comparing to what you feel comfortable);
- are there any critical issues that send your phone into reboot or force you to reset your phone? If yes – you may be using an unstable ROM or ROM/radio combination.
Overall process took me two evenings and a weekend, but right now I am a proud owner of the same old AT&T Tilt (a.k.a. HTC TyTN). However, the new TouchFLO interface with software lock that looks like iPhone’s “Slide to unlock” (you actually have to slide your finger to unlock the phone, but still get to use your favorite Windows Mobile OS – isn’t it cool?), updated Mobile Internet Explorer and Opera browser, clean Windows Mobile 6.1 installation with updates and fixed GPS connectivity. And plenty of memory is available to install more stuff as I need.
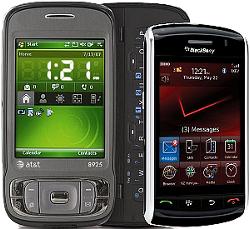
 Last few weeks I was diving into a few gadgets I was missing on before. The place where I sit throughout the day has the worst possible reception spot for AT&T network – my AT&T Tilt (TyTN II) drops to GPRS in the middle of downtown Manhattan. A dozen steps towards any window improves the situation, but it’s not always possible. I asked people around, but since mostly they’re wielding iPhones with bad enough reception already, there was no way of knowing what would work. Testing with regular phones as well as Samsung Blackjack showed that the problem persists to the spot, rather than device (especially since I had flashed an updated version of radio). Recalling my previously very much decent experience with Verizon, I went to the closest store and bought Blackberry Storm.